GitHub Copilot is only as good as the context you give it. Without proper guidance, you’ll waste time correcting off-target recommendations or explaining basic project details repeatedly.
A well-crafted copilot-instructions.md file provides consistent, project-specific context for every prompt. You get:
- Better first drafts
- Fewer corrections
- Faster work in Agent mode
Let’s examine how to build an effective instructions file.
Don’t vibe your copilot-instructions.md
I researched on GitHub and in developer communities to see how people write their copilot-instructions.md files. The majority either let an LLM generate it without proper project context, or copy/paste generic instructions from others.
The result is mostly generic AI slop. Don’t do that.
The copilot-instructions.md file becomes part of every Copilot request’s context window. Since it’s included with every prompt, its content directly impacts the quality and relevance of all suggestions. Research shows that irrelevant information can drastically reduce response quality or, worse, send the AI astray entirely. Therefore, avoid generic sentences that just waste tokens and instead prioritize project-specific details Copilot can’t immediately infer from your code alone, e.g. architectural patterns, domain terms, and non-obvious constraints.
But first, let’s set it up.
Setting up your copilot-instructions.md
You have two starting options: writing it yourself by filling out the skeleton below or have Copilot Agent bootstrap it for you and then edit the file. Due to the reasons above, I recommend using the former option.
Option 1: Write the file yourself (recommended)
In your repository root, create the folder .github if it doesn’t exist already.
Then, create an empty file in that directory called copilot-instructions.md and copy/paste the following content into the file:
## Summary<!-- brief summary of the repository -->
## Terminology<!-- list of domain specific terms with their explanation -->
## Architecture<!-- short summary of the architecture -->
## Task planning and problem-solving<!-- the most important problem-solving guidelines --><!-- e.g. "plan the task before writing any code" -->
## Coding guidelines<!-- the most important coding guidelines -->
Option 2: Generate the file with the Copilot Agent
Alternatively, you can let GitHub Copilot Agent generate the file with the latest VSCode release (@pierceboggan thanks for the heads-up):
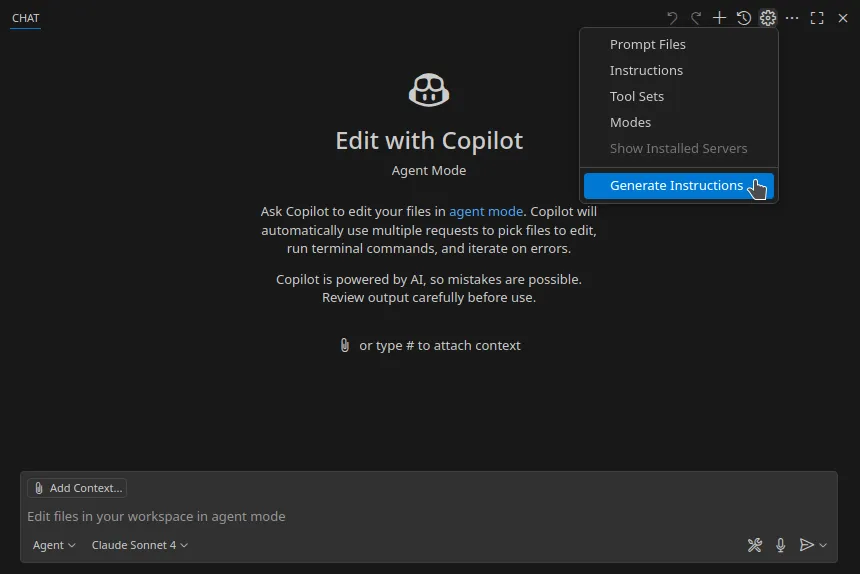
This will provide you with a usable starting point but some information will most likely be off or even incorrect and some will be missing. Therefore, after creating the file, go over each sentence, improve the existing content iteratively, and add your own.
Next, let’s cover what to include.
What to include in your instruction file
I researched the most frequently used sections in copilot-instructions.md files to identify effective practices. Use these as inspiration, but tailor them to your project and Copilot usage. If you use Copilot to only generate unit tests for a React repository, your instruction file will look very different from someone who only uses it to generate new features for Java services.
Summary
Summarize your repository briefly, e.g.:
This repository contains the source code for a Pokémon cardtrading platform's web app, enabling online card trading.It manages trade processing and card inventory tracking.Terminology
List domain-specific terms with explanations, e.g.:
- trade - User’s trade request (card, condition, price).- stock - Inventory of Pokémon cards for tracking and listing.- queue - List of pending trades, prioritizing user offers.Architecture
Describe the architecture, focusing on non-obvious details. This section is most effective when you explain the “why” behind your architectural decisions, not just the “what”. Also, make sure to reference important files:
The React frontend interacts directly with Supabasefor database operations, user authentication, andreal-time trade updates, while integrating withthe PokeAPI for Pokémon data. Supabase was chosen for itsreal-time capabilities and PokeAPI for its generousrate limits.- `supabaseClient.js` - Supabase client & authentication.- `realTimeTradeSubscriptions.js` - Manages trade updates.- `pokeApiIntegration.js` - Interacts with PokeAPI.Task planning and problem-solving
LLMs struggle with common sense and problem-solving. To improve Copilot’s task accuracy, include step-by-step instructions in this section. I noticed better results when telling the LLM to plan before coding. Some models drown problems in code until they work (Claude 👀). Instructing Copilot to reuse existing code helps.
- Before each task, you must first complete the following steps: 1. Provide a full plan of your changes. 2. Provide a list of behaviors that you'll change. 3. Provide a list of test cases to add.- Before you add any code, always check if you can just re-use or re-configure any existing code to achieve the result.Model-specific instructions
If you find yourself mostly working with the same AI model, you probably notice some recurring flaws or annoyances. Use this section to nudge the LLM in your desired direction. For example, if the AI tends to be over-comprehensive, use something like this:
- Always focus on simplicity and precision and not comprehensiveness.- When writing tests, focus on the happy path and only the most important edge cases.- Before adding a new test, always make sure that a similar test doesn't exist already.Language-specific instructions
Add language specific rules or use code generation instructions (at the time of writing only available for VSCode).
Try 10xrules.ai to generate these quickly.
Coding Guidelines
Specify coding styles not caught by linters. Include examples where needed.
What else?
These are just the most commonly useful examples. Add other relevant instructions specific to your project. For instance, here are two Reddit posts that contain some additional categories which can be used as further inspiration: 1, 2.
But first, let’s ensure your instructions follow an effective writing style.
How to write your copilot-instructions.md
Whatever you finally decide to include in your copilot-instructions.md file, I recommend following this writing tips. They ensure your instructions are clear and actionable for Copilot:
Use consistent imperative voice.
<!-- Don't ❌ -->When fixing a bug, it helps to write a failing test first.
<!-- Do ✅-->When fixing a bug, always write a failing test first.
Don’t be generic. Advice should be specific and actionable.
<!-- Don't ❌ -->Write maintainable code.
<!-- Do ✅ -->Always follow the DRY principle and avoid code duplication.
Instead of just telling the AI what not to do, tell it what to do instead.
<!-- Don't ❌ -->Don’t use hard-coded numbers.
<!-- Do ✅-->Avoid hard-coded numbers and use shared constants instead.
Don’t add style guides that your linter catches anyway. Less is more.
<!-- Don't ❌ -->- Follow the ESLint rule `default-case`.- Always add a `default` case at the end of a `switch` statement.
<!-- Do ✅ --><!-- Let your linter catch these issues instead. -->
Don’t link to external resources in the instructions.
<!-- Don't ❌ -->The API endpoint to retrieve data about a specific Pokémonis defined [here](https://pokeapi.co/docs/v2#pokemon).
<!-- Do ✅-->To retrieve data about a specific Pokémon, send a `GET` requestto `https://pokeapi.co/api/v2/pokemon/{id or name}/`.
Include examples where necessary, especially when writing about patterns.
<!-- Don't ❌ -->Prefix boolean variables with an appropriate verb.
<!-- Do ✅-->Prefix boolean variables with an appropriate verb, e.g.`isLoading`, `hasPermissions`, `matchesFilter`.
Bonus: Boost the Agent mode
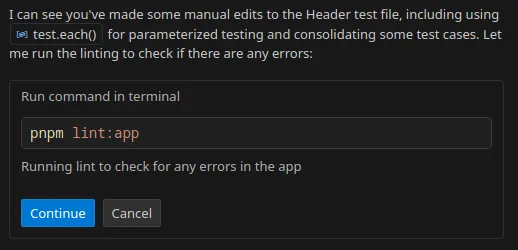
GitHub Copilot’s Agent mode runs tasks in the background while you focus elsewhere. Ideally, you give it an instruction, and it completes code, tests, and checks automatically. In reality, Copilot often changes code and stops, needing prompts to run linters or tests. Adding upfront instructions can automate this process.
For this, add to the task planning section of your copilot-instructions.md:
If you add new code or change existing code, always verify thateverything still works by running *each* of the following checks:1. `npm run lint` to run the linter.2. `npm run test:unit` to run the unit tests.3. `npm run test:e2e` to run the e2e tests.
Complete the task only after all checks pass.
Copilot adds changes, runs the commands, assesses output, and iterates until all errors are fixed:
By default, Copilot requires your approval for each tool usage, but in VSCode, you can add "chat.tools.autoApprove": true to your settings.json to enable auto-approval and go full vibe-coding.
Wrapping up
A tailored copilot-instructions.md saves you time and improves Copilot’s output. Focus on specific, actionable instructions to guide its suggestions. Use the tips above to craft a file that fits your project and let me know how it goes! Did I miss any tips you use for copilot-instructions.md?